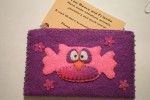
When it comes to the festive season, there are plenty of common motifs and symbols that can be incorporated into your family’s Christmas greeting cards. This article will look at two of the most ubiquitous card themes – stars – and give your ideas for how to make a card design (or more!) at Christmas-time with your children.
Good Colours
For the star itself, you can choose from a variety of colours: yellow, orange, white, silver, gold, copper. The star works well when transposed against a dark background colour (you can’t go wrong with black!). These are all readily available paint colours, although metallic crayons will also show up strongly if applied directly onto a black background.
Start with a white or pale-coloured piece of craft paper to form the backbone of the card. Then your children can glue the desired colour of decorative background on top of that.
Star Shapes
The traditional star shape has simply five points. If you and your kids are feeling adventurous then together you can design more sophisticated-looking stars. Stars that have eight points – with the four axial & horizontal points longer than the points in between – or twelve are a bit more unusual and fiddly to cut out… but will nonetheless look good.
Your family also has the option of creating stars that have very straight, angular lines or cartoon-like curving ones. There is no shortage of choices out there for your star design!

Stencils
The advantage of a stencil-based card design is that it minimises the need for tricky (and repetitive) gluing and cutting. Younger children in particular will need more adult input into their cards and will benefit from this approach.
All that’s needed is an outline of a star cut onto a piece of durable card paper. The outline can then be placed over the front of the card and painted in any way that your kids desire. Don’t limit yourselves to a single colour of paint – add glitter to give your cards an eye-catching shine!
The second option is to create a stencil but use it to create a star cut-outs on a different sheet of paper that can be decorated and stuck onto the main body of your cards with a bit of glue.
Paper Layering Effects
If your children are a bit older and can handle a more time-intensive craft activity, then get them to build up their stars using layers of coloured paper. Glue successively smaller star outlines in alternating colours on top of each other. Make a traditional star from superimposing two triangles (one upside-down).
Card Background
If your kids are creating a card with a black or dark background, then you might want to create a night sky effect by adding in a lot of smaller stars. A very straightforward way is with a metallic gel or ink pen – your children just need to spot the metallic colour onto the card to give the illusion of a starry sky. Older kids with a steady hand can either stick small stars into the paper or draw them in. Small star glitter is a staple of most craft stores.
There you have it! How to make a card with a star theme to suit kids of all ages, and which your friends and family will be delighted with!


